
Masking Tape Painting | 8 Creative Ideas for Beginners Painting Inspiration
author: CRAYON-JIAO TAO TAO
2026-02-07

Masking Tape Painting 8 Creative Ideas for Beginners Painting Inspiration
Table of Contents
-
Introduction: Solve Beginners' Painting Pain Points, Masking Tape Becomes a "Universal Tool"
-
8 Directly Implementable Masking Tape Painting Creative Plans (with Detailed Steps)
-
Beginners' Practical Guide: 4 Zero-Failure Tips
-
Dry Goods Guide: Comprehensive Analysis of Masking Tape Purchase + Pitfall Avoidance Guide
-
Practical Material Summary: Painting Preparation Tools
-
Interaction and Suggestions: Beginners' Practical Suggestions and Call for Work Sharing
I. Introduction: Solve Beginners' Painting Pain Points, Masking Tape Becomes a "Universal Tool"

As a "hidden artifact" for beginners' painting, non-residue masking tape has moderate adhesion and can be torn off without leaving traces. It can not only accurately divide the picture and create clean edges, but also unlock various textures through splicing and folding, suitable for various beginner art projects, masking tape painting ideas for beginners and canvas painting.
II. 8 Directly Implementable Masking Tape Painting Creative Plans (with Detailed Steps)
The following 8 plans are progressive. Beginners can first try plans 1-4 to gradually master the use skills of masking tape, and then unlock more creative texture, polka dot and other ways to play. Each step is clearly marked, and you can get the effect by following it.
Plan 1: Geometric Color Block Collage (Simple and Advanced, Suitable for All Home Styles)
Knowledge Point: No painting foundation is needed. Use masking tape for canvas to divide geometric shapes, fill in colors and tear off the tape to present a simple and advanced visual effect. It can also exercise beginners' color matching ability, suitable for minimalist canvas art, and it is very suitable to be placed in the living room and bedroom.
 Practical Steps:
1.Prepare a 10-20cm blank pure cotton canvas, tear the low-tack masking tape into strips of different lengths at will, gently press them on the canvas to divide into triangles, rectangles, irregular polygons and other shapes (no need to pursue symmetry, random splicing is more artistic). Press the edge of the tape to ensure it is completely attached to the canvas to avoid paint penetration during subsequent coloring.
2.Choose 2-3 acrylic paints of the same color system or complementary colors. For beginners, Morandi colors and macaron colors are recommended, which are not easy to make mistakes; use a wide brush to fill them into the divided geometric areas respectively. Apply evenly when coloring, do not paint beyond the tape boundary, and you can appropriately overlay a small amount of paint to increase the layering of the picture.
3.Wait for the paint to be half dry (touch without sticking hands, about 15-20 minutes), tear off the masking tape quickly and smoothly at a 45° angle to expose the white boundary of the canvas itself, creating a neat geometric line sense. Tear off quickly to avoid blurred boundaries caused by delay.
4.After the paint is completely dry, you can gently outline a 1mm thin line on the edge of the color block with a fine brush, or dot a small amount of spots with white paint to improve the delicacy of the picture. No complex modification is needed, and the simple and advanced geometric color block painting is completed, which can be directly placed for decoration.

Plan 2: Tape White Space Watercolor Birch Tree Painting (Gentle and Healing, Suitable for Lovers of Fresh Style)
Knowledge Point: Use the occlusion and white space function of masking tape for watercolor to create clean birch tree trunks, with a soft watercolor background. The picture is gentle and healing, and it can also let beginners quickly master the basic skills of watercolor washing, suitable for watercolor landscape art, and suitable for beginners who like fresh forest style.
 Practical Steps:
1.Stick 3-5 strips of watercolor masking tape of different lengths at the bottom of the canvas as the trunks of birch trees. The bottom of the tape can be slightly inclined to simulate the natural growth shape of birch trees, and the top can be torn into irregular serrated shapes to increase the realism of the picture.
2.Mix light blue, lavender and off-white with watercolor paint, and apply the upper part of the canvas in a washing way to create a natural effect of sky and clouds. Apply gently when coloring, do not leave obvious brush strokes, ensure the color transition is natural, and avoid rigid color block boundaries.
3.Wait for the watercolor to be completely dry (about 25-30 minutes), carefully tear off the masking tape to expose the white birch tree trunks. If a small amount of paint penetrates into the edge of the tape, you can gently modify it with a white fine brush to make the trunk outline clearer.
4.Use a black fine brush to dot small circles on the trunk (simulating the annual rings of birch trees), and then gently dot with light green watercolor around the trunk to simply outline the outline of leaves. No detailed depiction is needed, and the natural and casual feeling is retained. The gentle and healing birch tree painting is completed.
Plan 3: Abstract Line Overlay Painting (Personality and Niche, Beginners Can Also Play Art Sense)
Knowledge Point: No deliberate design is needed. By pasting and tearing art masking tape many times and overlaying lines of different colors, you can create an abstract and casual picture. The more casual it is, the more personality it has. It is suitable for beginners who like niche style and want to try abstract art, suitable for abstract masking tape art, and it is very elegant to decorate niche homes and desks.
 Practical Steps:
1.Randomly paste masking tape on the blank canvas, which can be pasted horizontally, vertically, obliquely, or even cross pasted to form messy but regular lines. A small amount of space can be left between the tapes, or some can overlap. There is no need to pursue regularity, just highlight the abstract sense.
2.Choose 1 main color acrylic paint (black, dark gray, navy blue are recommended), apply the entire canvas evenly with a wide brush, completely covering the tape and blank areas. Apply with uniform force to ensure full color and no missing coating.
3.Wait for the paint to be half dry, randomly tear off part of the tape (no need to tear off all), expose the white lines of the canvas itself, and then paste a few new masking tapes to cover part of the painted area to create a sense of line overlay layering.
4.Choose 1 light color paint (white, off-white, light pink), gently apply around the blank area and the newly pasted tape to form a color overlay effect; after the paint is completely dry, tear off the remaining tape, and dot a small amount of bright spots with a fine brush to decorate. The personalized and niche abstract line painting is completed.
Plan 4: Tape Frame Text Decoration Painting (Warm and Meaningful, Can Customize Exclusive Copy)
Knowledge Point: Use decorative masking tape to splice the frame, write favorite words and short sentences in the middle, and match with simple color block decoration. It is warm and meaningful. It can customize names, inspirational short sentences and healing copy. It is suitable as a gift or home decoration, suitable for custom canvas art, and beginners can easily make a sense of exclusivity.
 Practical Steps:
1.Use masking tape to splice a rectangular or square frame in the middle of the canvas. The width of the frame can be adjusted according to the size of the canvas (2-3cm is recommended). Gently press the edge of the tape to ensure tight fit, avoiding paint penetration outside the frame during subsequent coloring.
2.Choose light color acrylic paint (off-white, light blue, light gray), apply the blank area inside the frame with a wide brush, apply evenly, do not paint beyond the frame, and wait for the paint to be half dry after application.
3.Use a black or dark fine brush to write favorite words in the middle of the frame (such as "Joy", "Healing", "Peace and Joy", "Live in the moment"). The font can choose simple Song typeface, Kai typeface, or handwritten typeface. For beginners, you can first gently outline the outline with a pencil, then color it to avoid mistakes in writing.
4.After the paint is completely dry, tear off the masking tape frame to expose a clean boundary, and then draw a few simple patterns (dots, lines, small hearts) around the frame with the same color paint to simply decorate the picture. The exclusive text decoration painting is completed.
Plan 5: Gradient Color Block Division Painting (Advanced and Photo-Friendly, Easily Master Gradient Skills)
Knowledge Point: Use masking tape for acrylic painting to divide the picture, create a gradient color effect in each area. After tearing off the tape, the gradient color block matches clean edges, which is advanced and photo-friendly. Beginners can quickly master the basic method of gradient coloring, suitable for gradient canvas painting, and it is very photo-friendly to take photos and post on social platforms.
 Practical Steps:
1.Use masking tape to cut the canvas vertically or horizontally into 2-3 equal areas. Gently press the edge of the tape to ensure it is completely attached to the canvas to prevent paint penetration. For beginners, it is recommended to divide into 2 areas, which is simpler to operate and easier to master gradient skills.
2.Choose two acrylic paints of similar colors (such as light pink → dark pink, light blue → dark blue, light yellow → dark yellow). In the first area, gradually transition and color from left to right (or top to bottom), gently blend with a brush to create a natural gradient effect. Blend gently to avoid color mixing.
3.In the second area, apply another gradient color in the same way. Note that the colors of the two gradient color blocks should be coordinated, not too contrasting. Avoid painting beyond the tape boundary when coloring, and ensure the gradient effect of the two areas is natural and smooth.
4Wait for the paint to be half dry, tear off the masking tape quickly at a 45° angle to expose a clean boundary. If the gradient effect is not natural enough, you can gently blend and modify it with a brush; after the paint is completely dry, the gradient color block division painting is completed, which is advanced and beautiful when placed.
Plan 6: Tape + Dry Brush Texture Painting (Outstanding Texture, Unlock New Texture Ways)
Knowledge Point: Combine the occlusion function of textured masking tape art with dry brush skills to create a rough and layered texture, get rid of the monotony of flat painting, and make the picture more textured. Beginners can also easily unlock the way of texture painting, suitable for textured canvas art, and suitable for beginners who like texture style.
 Practical Steps:
1.Paste masking tape on the canvas to divide into irregular areas. You can reserve 1-2 large blank areas for creating dry brush texture. When pasting the tape, you can leave a little gap to increase the layering of the picture, not necessarily completely fit tightly.
2.Choose dark color acrylic paint (dark brown, dark gray, dark green are acceptable), dip a small amount of paint with a dry brush (the brush is dried without dipping water), and apply it in the blank area by gently wiping to create a rough texture. Do not apply evenly, keep the brush stroke marks, and highlight the texture effect.
3.In other divided areas, apply light color paint (off-white, light brown, light green), apply evenly to form a sharp contrast with the texture area, highlighting the picture texture. After application, wait for the paint to be half dry.
4.Tear off the masking tape to expose a clean boundary, then dip a small amount of bright color paint (gold, silver) with a dry brush, and gently dot it in the texture area to improve the delicacy of the picture. The textured painting with full texture is completed.

Plan 7: Simple Plant Outline Painting (Fresh and Natural, First Choice for Forest Style Lovers)
Knowledge Point: Use masking tape plant art to outline simple plant outlines, and create simple and natural plant shapes through occlusion and white space. With a soft watercolor background, it is fresh and natural. No detailed depiction is needed, and beginners can easily control it, suitable for botanical canvas art, and suitable for forest style lovers.
 Practical Steps:
1.Use masking tape to splice simple plant outlines (such as maple leaves, ginkgo leaves, grass, daisies) on the canvas. You can refer to simple plant stick figures. There is no need to be too regular when splicing the tape. It is more natural to be a little casual. For beginners, you can first gently outline the outline with a pencil on the canvas, then paste the tape to avoid mistakes in splicing.
2.Choose light green, light green and off-white watercolor paint, mix them, and apply the entire canvas in a washing way as the background. Apply gently when coloring, the color transition is natural, do not cover the tape outline, and ensure the plant outline is clearly visible.
3.Wait for the watercolor to be completely dry, carefully tear off the masking tape to expose the white plant outline. If a small amount of paint penetrates, you can gently modify it with a white fine brush to make the outline clearer.
4.Use green and yellow fine brushes to gently dot on the plant outline to simulate the leaf veins and petal textures. No complex depiction is needed, just simple decoration. The fresh and natural plant outline painting is completed.
Plan 8: Tape Spliced Polka Dot Decoration Painting (Cute and Vivid, Suitable for Children's Room)
Knowledge Point: Cut masking tape dots into small sections, splice them into polka dot patterns, and match with bright and lively colors. The picture is cute and vivid, simple to operate, and can exercise hands-on ability. It is suitable for beginners who like cute style, and can also be made with children, suitable for cute canvas art for kids, and it is very suitable to decorate children's rooms and desks.
 Practical Steps:
1.Cut the masking tape into small circles of different sizes (for beginners, you can first draw circles on the tape with a compass, then cut them, or cut them randomly. Irregular polka dots are more cute), then paste the small circles on the canvas randomly to form a polka dot pattern, which can be dense or sparse, adjusted according to your own preferences. Press gently when pasting to ensure it is attached to the canvas.
2.Choose bright acrylic paint (pink, yellow, blue, green are acceptable), use a small brush to color different polka dots respectively. Each polka dot is painted with one color, and the colors can be matched randomly to create a lively and vivid effect. Do not paint beyond the polka dot boundary when coloring to ensure the polka dot outline is clear.
3.Wait for the paint to be half dry, tear off all the masking tape circles to expose the white polka dot outline of the canvas itself. At this time, the picture will present a cute effect of "colorful background + white polka dots", fresh and vivid.
4.After the paint is completely dry, draw a few small lines around the polka dots with a fine brush, or dot a small amount of small dots with the same color paint to decorate the picture and improve the delicacy. The cute polka dot decoration painting is completed, which can be directly placed in the children's room and desk, full of atmosphere.
III. Beginners' Practical Guide: 4 Zero-Failure Tips
Combined with the high-frequency problems of beginners' practical operation, we have sorted out 4 zero-failure tips. No matter which plan you try, remember these tips to avoid mistakes and easily make beautiful works. Beginners must collect them!
Tearing Timing is Key: In all plans, the best time to tear off painting masking tape is when the paint is half dry (touch without sticking hands). At this time, tearing off will not damage the canvas, nor will it cause paint penetration, and can maximize the retention of clean edges; if the paint is completely dry, you can first use a hair dryer to heat and soften the adhesive at low temperature, then tear it off, avoiding paint falling off caused by forced tearing.
Canvas and Paint Selection is Important: For beginners, it is recommended to choose a small canvas of 10-20cm, which is simpler to operate and easier to get started; paint preferably chooses acrylic paint (fast drying, full color, not easy to fade), suitable for most plans; watercolor paint is suitable for beginners who like fresh style, and the effect is better when used with watercolor masking tape.
Tape Use Tips: It is recommended to choose low-adhesion masking tape (especially for watercolor painting) to avoid damaging the canvas when tearing off; before pasting the tape, you can stick it on waste paper first to reduce adhesion and better protect the fragile canvas surface; just press gently when pasting, do not press too hard, to avoid strong adhesion and difficulty in tearing off.
No Need to Pursue Perfection: Beginners can boldly try, splice tape and match colors at will. Occasional small mistakes (such as a small amount of paint penetration) can make the picture more personalized and unlock unexpected creative effects; there is no need to deliberately imitate the tutorial, and adjust according to your own preferences to make works with a full sense of exclusivity.
IV. Dry Goods Guide: Comprehensive Analysis of Masking Tape Purchase + Pitfall Avoidance Guide
Many beginners feedback that obviously the steps are correct, but the work fails because they buy the wrong masking tape (leaving glue, damaging the canvas, paint penetration). This time, we have sorted out a detailed purchase guide, including the tape categories and purchase points that meet the painting needs, as well as the high-frequency pitfalls of beginners. Beginners can directly buy and avoid pitfalls according to it, without trying and making mistakes again.
(I) Comprehensive Analysis of Masking Tape Purchase (Beginners Can Buy Directly Without Pitfalls)
When buying masking tape for painting, the core is to look at "adaptability". Priority is given to styles marked "for painting", and choose according to your own painting method (acrylic, watercolor). The following are specific categories and purchase points.
1. 3 Types of Tape Must Be Bought to Meet Painting Needs (Sorted by Priority)
(Washi Masking Tape for Art): First choice! Soft material, good air permeability, moderate adhesion (mainly low adhesion), no residue after tearing, not easy to damage watercolor paper and canvas, suitable for various painting methods such as watercolor, acrylic and colored lead, especially suitable for watercolor painting of plans 2 and 7; various colors, can take into account decoration, first choice for beginners to get started.
(Paper Masking Tape for Canvas): Cost-effective choice, thin material, medium adhesion, suitable for acrylic painting (plans 1, 3, 5, 6, etc.), suitable for ordinary pure cotton canvas, basically no residue after tearing; affordable price, suitable for beginners to buy in bulk for daily practice.
(Low-Tack Masking Tape for Art): The adhesion level must be chosen by all beginners! Whether it is washi or paper, priority is given to low adhesion to avoid the tape tearing off the canvas paint and damaging the paper when tearing off; especially suitable for fragile canvas and thin watercolor paper, which can maximize the protection of works.
2. 4 Key Parameters Must Be Seen When Purchasing (Indispensable)
Width: 1-2cm, suitable for all 8 plans, suitable for dividing lines, splicing patterns and making frames. There is no need to buy too wide (inconvenient to operate) or too narrow (troublesome to splice).
Adhesion: Low adhesion (marked "low-tack" on the package). For watercolor painting, priority is given to "ultra-light adhesion" to avoid leaving glue after the tape is softened by water; for acrylic painting, "low-medium adhesion" can be selected to ensure tight fit and no paint penetration.
Marking: The package must have "for art/painting" to avoid buying industrial-grade masking tape (no marking, extremely strong adhesion). Industrial tape is not suitable for painting, easy to leave glue and damage the canvas.
Additional Attributes: Priority is given to styles marked "acid-free" and "non-residue", which can protect the canvas and paper from yellowing and corrosion, and extend the preservation time of works.
3. Recommended Purchase Channels
Priority is given to purchasing through regular channels to avoid buying inferior tape. 3 channels where suitable styles are easy to find are recommended:
Online Channels:
Our official store (https://zgmiaosen.en.alibaba.com/productgrouplist-911473340/Masking_Tape.html)
Our official shopping website (https://www.clothadhesive.com/paper-tape.html), which can also meet your customization and procurement needs


Offline Channels:
Art supply stores (Michael’s, Joann), where you can touch the tape adhesion and check the material on site, so you can choose the suitable style more accurately, which is suitable for beginners who are not good at online selection.
(II) High-Frequency Pitfall Avoidance Guide for Beginners (4 Purchase Pitfalls + 6 Use Pitfalls)
1. Purchase Pitfall Avoidance: 4 Core Pitfalls, Never Step On
Do not buy industrial-grade masking tape: Industrial tape has extremely strong adhesion, no "for painting" mark, will definitely leave glue marks and damage the canvas after tearing off, and even cause the canvas to peel off and watercolor paper to break, which is completely unsuitable for painting; do not buy low-price tape without any marks.
Do not buy cheap disposable inferior tape: Inferior masking tape is easy to break and wrinkle, cannot be completely attached to the canvas when pasted, paint is easy to penetrate, and may leave glue after tearing off, which is a waste of canvas and paint; for beginners to get started, just buy basic washi/paper tape, no need to pursue high price, but also cannot buy the cheapest inferior tape.
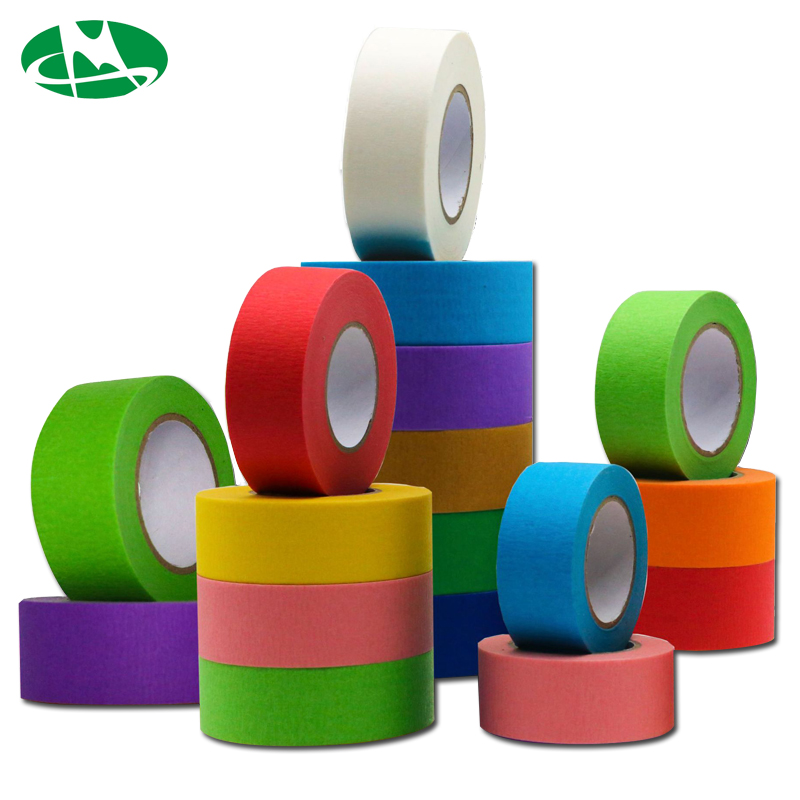
Do not blindly buy colored/patterned tape: Colored and patterned tape is only suitable for decorating the polka dot painting of plan 8, and white/off-white tape is still needed for core painting; the adhesion of colored tape may be uneven, and the color is easy to penetrate into the paint, affecting the picture effect; beginners should first stock up on white basic models, and then supplement colored models when there is a demand.
Do not buy too wide/too thin tape: If the width exceeds 2cm, it is inconvenient to operate when dividing thin lines and cutting polka dots; too thin (less than 0.1mm) tape is easy to break, easy to wrinkle when pasted, and difficult to attach to the canvas; priority is given to styles with width of 1-2cm and moderate thickness (0.1-0.2mm).
2. Use Pitfall Avoidance: 6 High-Frequency Mistakes, Beginners Must Avoid
Do not press too hard when pasting: Pressing the tape too hard will make the adhesion stronger, and it is easy to damage the canvas/paper when tearing off; just press the edge gently to ensure it is attached without warping, especially suitable for low-adhesion tape.
Do not forcefully tear off the completely dry tape: After the paint is completely dry, the tape adheres to the paint and canvas. Forced tearing will tear off the paint and leave glue marks; the best time to tear off is when the paint is half dry. After it is completely dry, it needs to be heated and softened with a hair dryer at low temperature before tearing off.
Do not soak the tape in watercolor painting: When washing watercolor, avoid the tape contacting a lot of water for a long time, otherwise it will soften the tape, reduce adhesion, and cause paint penetration; dry the water on the tape surface in time after washing to reduce tape softening.
Do not paste the same roll of tape repeatedly: After the tape is torn off and pasted again, the adhesion will decrease, and it is easy to adhere to dust and paint, leading to incomplete fit and paint penetration; try to paste each section of tape in place at one time, avoiding repeated pasting.
Do not touch the wet acrylic tape: When the acrylic paint is not dry, touching the tape will cause paint adhesion, resulting in burrs and blurred boundaries when tearing off; wait patiently for half dry after coloring before tearing off.
Do not store the tape randomly: High temperature will make the tape more adhesive and deformed, and humid environment will cause the tape to mold and degum, affecting the use effect; store it in a dry and normal temperature place, sealed and preserved to extend the service life.
V. Practical Material Summary: Painting Preparation Tools
To facilitate beginners to prepare materials quickly, this time we have sorted out all the tool materials needed for the full text. The tool list can be bought directly, saving time and improving efficiency.
(I) Summary of Painting Tools (Divided into General + Exclusive, Beginners Can Buy Directly)
1. General Materials (Needed for All Plans, Prepare in Advance)
Art Masking Tape: 1-2 rolls, width 1-2cm, low-tack washi masking tape is recommended, white or off-white is acceptable; priority is given to styles marked "non-residue" and "for art", suitable for all plans.
Canvas: 10-20cm blank pure cotton canvas. For beginners, finished canvas can be chosen, no need to stretch the frame by yourself, saving time and easier to operate.
Paint:Acrylic paint, 12-color set is recommended, including Morandi color, macaron color and basic dark color, meeting the needs of all plans; watercolor paint, optional, suitable for plans 2 and 7, 12-color solid watercolor is recommended, easy to carry and mix.
Brush: 1-2 wide brushes (for large-area coloring), 2-3 fine brushes (for outlining lines and decorating details), 1 dry brush (for texture effect of plan 6). For beginners, basic brushes can be chosen, no need to pursue professional and high-end models.
Auxiliary Tools: 1 pencil (for beginners to gently outline the outline, erasable), 1 eraser, 1 palette, 1 water cup (for mixing watercolor paint and cleaning brushes), 1 pair of scissors (for cutting tape, necessary for plan 8).
2. Exclusive Materials for Each Plan
Plan 2 (Birch Tree Painting): 1 black fine brush (for drawing birch tree annual rings), light green watercolor paint (for decorating leaves), preferably matched with watercolor masking tape.
Plan 4 (Text Decoration Painting): 1 black or dark fine brush (for writing text), a small amount of gold and silver paint can be prepared (for decorating the frame), and can be matched with decorative masking tape.
Plan 6 (Texture Painting): Dark color acrylic paint (dark brown, dark gray, dark green are acceptable), gold/silver paint (optional, for decorating texture area), matched with paper masking tape for canvas.
Plan 8 (Polka Dot Painting): Bright color acrylic paint (pink, yellow, blue, green are acceptable), 1 pair of scissors (for cutting tape circles), a small amount of colored masking tape dots can be prepared.
Other Plans: No additional materials are needed, and they can be completed with general materials. The tape is preferably non-residue masking tape.
VI. Interaction and Suggestions: Beginners' Practical Suggestions and Call for Work Sharing
The above are the 8 masking tape painting ideas for beginners sorted out this time. From plan steps, beginner tips, to tape purchase, pitfall avoidance guide, and material summary, they are all tailored to beginners' needs. Without professional skills, as long as you prepare the materials, you can get started with zero failure by following the steps.
Practical Suggestions for Beginners: Priority is given to trying Plan 1 (Geometric Color Block Collage), which is the simplest to operate and easiest to get effect, and can quickly gain a sense of accomplishment; in the process of trying, there is no need to pursue perfection, boldly exert creativity, even small mistakes can create exclusive personalized works.
Interaction Call: Which creative plan do you like best? After trying it yourself, welcome to share your works and exchange small skills and surprises of beginners' painting together~
Channels to Share Your Works
Search Facebook Group: (Sharing of masking tape painting creative works)
If you encounter any problems during the practical operation, you can leave a message in the comment area, and we will reply to you as soon as possible to help every beginner easily unlock the fun of masking tape painting!
is masking tape the same as painters tape
DIY Tape | Why Green PET High-Temperature Tape Is Taking the Craft World by Storm
Related Article
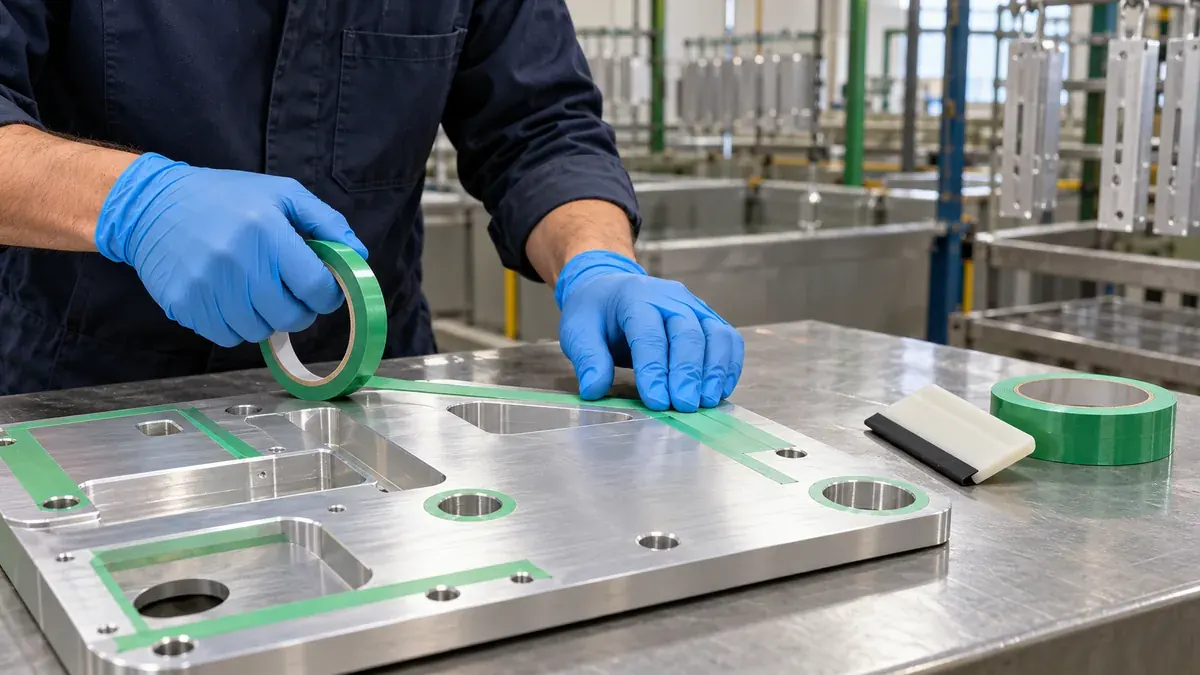
A process qualification guide for selecting, applying and validating PET silicone tape through a defined anodizing sequence.
How to Qualify PET Silicone Tape for Anodizing Masking
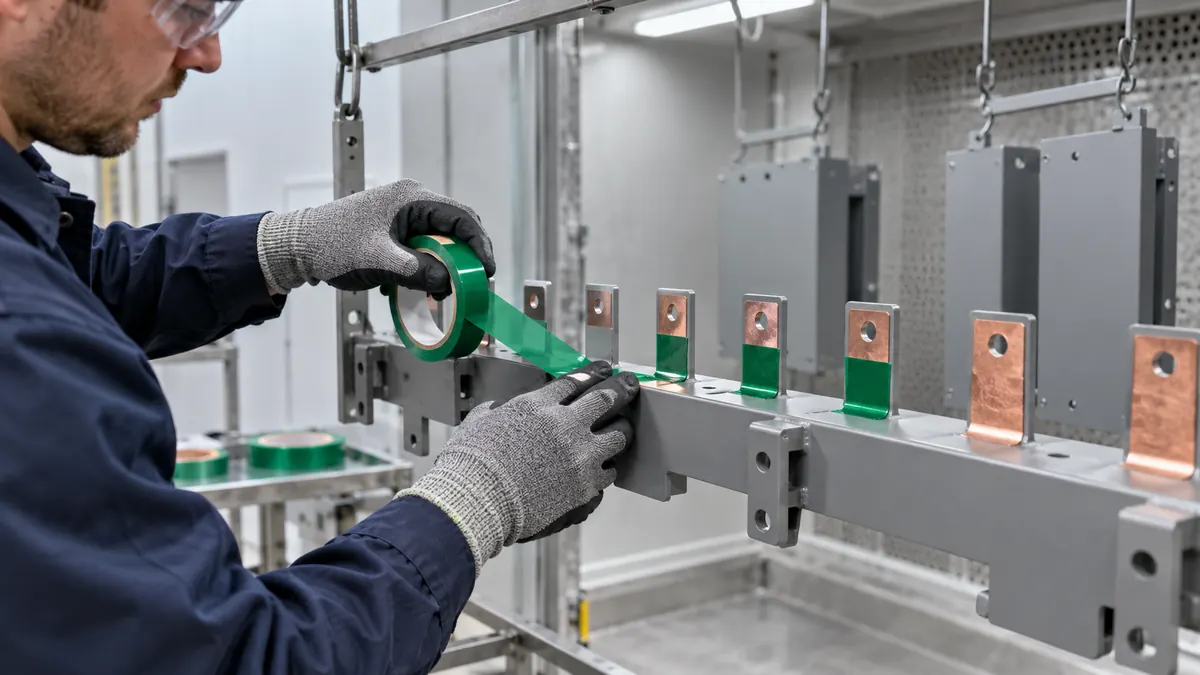
An application guide to defining, applying and validating PET silicone tape masks on busbar contact pads before powder coating.
PET Silicone Tape for Busbar Contact Pad Masking


Need help choosing the right industrial tape?
Send us your application details, including temperature, surface material, size, quantity and current problem. Our team will help recommend a suitable tape material or custom die-cut solution.

simon@jiaotaotao.com


+86-136 1277 5969


+86-136 1277 5969
