
ESD Tape for Component Trays: Secure Lids During Handling
Jiaotaotao ESD tape for component trays secures tray lids and closures during electronics handling, helping keep components contained as trays move between workstations. The anti-static PET tape provides a thin adhesive fixing strip at the tray perimeter, where an unsecured lid can lift, shift, or catch during transfer.
This article focuses on closing component transport trays within an electronics production workflow. The tape belongs on the outside closure area, away from device leads, contact surfaces, and component pockets. Effective use combines a correctly seated lid, clean bonding surfaces, consistent tape placement, and controlled removal at the receiving station.
In this guide — jump to a section
Where the Tape Belongs on a Component Tray
Keep readable
Keep adhesive outside
Press the strip onto flat landing areas on both parts. Leave labels, stacking features, and locating surfaces clear.
Fix the lid at the external closure
ESD PET tape can bridge the lid-to-tray joint to help hold the lid closed during handling. Position the strip across flat external areas on both parts so the adhesive has supported contact on each side. Keep the strip away from hinges, identification labels, stacking feet, and access features.
Tape should hold an already seated lid rather than pull a distorted tray into shape. Check that components sit inside their pockets and that nothing prevents the lid from closing. A trapped component or bent lid creates stored force that can lift the tape and damage the contents.
Use the ESD grade as part of the handling system
Anti-static PET tape adds a closure material intended for static-sensitive handling. Jiaotaotao supplies acrylic-adhesive ESD PET constructions and custom-converted pieces within its polyester tape range. The PET backing provides a low-profile strip that can be slit or die-cut around the tray closure geometry.
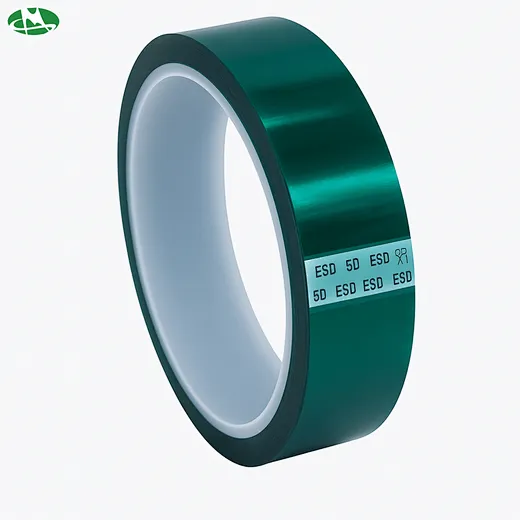
Apply ESD Tape for Component Trays Consistently
Clean the bonding areas before closing
Clean, dry tray edges give the adhesive a more consistent surface. Remove dust, fingerprints, and loose particles from the intended tape landing areas using the tray's suitable cleaning method. Let cleaned surfaces dry before application.
Check reusable trays for old adhesive and damaged edges. A fresh strip placed over a dirty patch may stick to the contamination rather than the tray. Replace cracked lids or distorted trays instead of adding extra tape to compensate for poor mechanical fit.
Place strips without stretching the backing
A relaxed strip is less likely to pull back from a tray corner. Cut the tape to a controlled length, seat the lid, then press the strip onto the flat tray and lid areas. Smooth it into contact without stretching it across the joint.
Use a simple workstation sequence:
- Check the tray identity, component count, and lid fit.
- Keep the closure areas dry and free of loose material.
- Align the strip with the designated external fixing position.
- Press the adhesive firmly onto both landing areas.
- Check for wrinkles, curled ends, and tape over identification fields.
- Place the closed tray into its intended rack or transport container.
Keep tape, liner scraps, and cutting tools on the closure side of the workstation. This reduces the chance of loose fragments falling into open pockets during packing.
Preserve stacking and label visibility
Keep barcodes and lot labels readable. If the current closure position crosses a label, move the tape landing area rather than covering the same code repeatedly.
Solve the Production Problems Behind Loose Tray Lids
Stop edges lifting during transfer
Edge lift commonly starts where the strip has little supported contact or is pulled around a sharp transition. Move the tape onto a flatter landing area, use a length that reaches usable surfaces on both parts, and press the ends down completely. Remove contamination before applying a replacement strip.
If lid springback pulls the tape loose, correct the lid seating first. Check for overfilled pockets, an incorrect lid, or a warped tray.
Keep adhesive and tape fragments out of component pockets
External placement keeps the adhesive away from device contacts and pocket interiors. Avoid wrapping a strip through the tray opening or placing its sticky face where components may touch it. Select an opening position that lets the operator remove the complete strip without reaching over exposed devices.
At receiving, place the tray on the designated ESD work surface before opening. Peel the tape back steadily, hold the tray stable, and collect the removed strip immediately. Do not snap the lid open while a remaining strip is still pulling on one corner.
Make opening repeatable without pulling the lid sideways
A consistent opening point helps operators remove the closure without twisting the tray. For repeated tray layouts, a die-cut strip can define the adhesive footprint and a handling tab. Keep the tab clear of components and ensure it cannot catch on adjacent trays during transfer.
Jiaotaotao offers ESD polyester tape with converting options for this type of external fixing task. Share the tray geometry and opening sequence to discuss slit rolls, pre-cut strips, or die-cut pieces.
Troubleshooting Component Tray Closures
Inspect the mechanical fit and the tape contact area together when a closure fails.
Swipe the table sideways to view all columns →
| Production problem | Likely cause | Practical corrective action |
|---|---|---|
| Tape ends lift | Dust, short landing area, or application tension | Clean the surface and apply a relaxed strip onto supported flat areas |
| Lid shifts despite intact tape | Incorrect seating, distorted parts, or an unsupported joint | Reseat the lid and replace damaged trays before retaping |
| Stacked trays rock or jam | Tape crosses a stacking feature | Move the closure strip clear of the locating surfaces |
| Barcode cannot be scanned | Tape covers or wrinkles the label | Keep the fixing position separate from identification fields |
| Old adhesive accumulates | Repeated taping over residue or inconsistent removal | Clean the landing area and standardize the opening method |
| Tape fragments enter pockets | Cutting or peeling directly over open components | Prepare strips away from pockets and collect removed material immediately |
Keep a reference photograph of an acceptable closed tray at the station. It should show the strip positions, clear labels, unobstructed stacking features, and the intended opening point.
Specify Tape for a Repeated Tray-Closing Process
A useful RFQ describes both the tray and the handling task. Provide Jiaotaotao with the tray and lid materials, closure photographs, landing-area dimensions, stacking arrangement, transfer method, and current failure. Include the time the tray stays closed and how it is opened at the next station.
State the required strip width, cut length, adhesive footprint, handling-tab preference, roll or sheet format, and order quantity. Include the facility's ESD material requirements and any relevant cleaning restrictions.
Frequently Asked Questions
Can ESD tape secure component tray lids?
Jiaotaotao ESD PET tape can be used across external lid-to-tray joints to help hold a correctly seated lid during handling. Keep the adhesive outside the component pockets.
Does ESD tape provide discharge shielding for a tray?
ESD closure tape does not replace discharge-shielding packaging. Use the packaging specified by the site's ESD control plan when components leave the protected area.
Why does tray closure tape lift at the ends?
Contamination, stretched application, and insufficient flat contact can lift the ends. Clean the landing areas, seat the lid, and press down a relaxed strip.
Should tape touch the electronic components?
Keep the tape on the outside closure areas and away from leads, contacts, and component pockets. Use the tray's intended features to support and separate the components.
Can the same strip be reused after opening?
Apply a fresh strip after opening and remove loose adhesive or debris from the landing area. Reused strips can carry contamination and have curled or damaged edges.
Can Jiaotaotao supply die-cut tray closure strips?
Jiaotaotao supports custom slitting and die-cutting for ESD PET tape. Send the tray drawing, fixing positions, opening method, and quantity for a proposal.
Contact Jiaotaotao for Tray Closure Tape
ESD tape for component trays supports an organized closure process when its shape and placement match the tray. Start with a seated lid, clean external landing areas, and strips applied without tension. Keep stacking features and identification visible, then remove the tape in the designated ESD handling area without leaving fragments near exposed parts.
Jiaotaotao (Guangdong) New Material Co., Ltd. supplies ESD PET tape and custom-converted closure pieces. Contact Jiaotaotao with the tray photographs, dimensions, material requirements, and production problem to discuss samples and a bulk supply format for your handling line.
PET Tape for Tumbler Masking: Protect the Lid-Fit Rim
PTFE Tape for Leather Embossing: Cleaner Platen Release
Related Article

Need help choosing the right industrial tape?
Send us your application details, including temperature, surface material, size, quantity and current problem. Our team will help recommend a suitable tape material or custom die-cut solution.

simon@jiaotaotao.com


+86-136 1277 5969


+86-136 1277 5969
